The Ultimate ICA Compliance Handbook: Professional Passport and IC Photos at Home
Master ICA photo requirements with our 2,500+ word expert guide. Learn technical biometric standards, lighting physics, and newborn photo techniques. Use our AI-powered passport photo app to ensure 100% compliance for Singapore passport, IC, and visa applications without the studio cost.
If you've ever sat in a cramped, fluorescent-lit photo booth at a neighborhood Sheng Siong or waited in line at a traditional studio in Peninsula Plaza, you know the drill. You shell out $15, get four physical prints you'll never use, and a digital file that looks like a 1990s mugshot. Then comes the real stress: uploading that file to the MyICA portal and praying the system doesn't kick it back three days later with a generic 'photo does not meet requirements' email.
I've spent years analyzing the intersection of biometric technology and photography. I can tell you that the vast majority of ICA (Immigration & Checkpoints Authority) photo rejections aren't because you aren't 'photogenic.' They happen because of microscopic technical failures—a shadow on the philtrum, a slight tilt of the head, or 'hotspots' from a camera flash that the ICA’s AI interprets as biometric noise. Using a dedicated passport photo app can eliminate these errors before you even hit submit.
In this handbook, I’m going to show you how to bypass the studio entirely. You can take a perfectly compliant, professional-grade passport or IC photo in your living room using nothing but your smartphone and a bit of physics. No generic fluff—just the direct, technical steps you need to get your application approved on the first try.
The Anatomy of an ICA-Compliant Photo #
When we talk about the ICA photo, most people jump straight to '35mm wide by 45mm high.' While those are the official dimensions for physical prints, the digital reality is more complex. The ICA uses sophisticated facial recognition software to map your 'biometric identifiers.' This means the computer isn't just looking at your face; it's measuring the distance between your pupils, the width of your nostrils, and the ratio of your chin to your forehead.
The 35mm x 45mm Myth: Why Dimensions Are Only Half the Story #
For a digital upload, the ICA requires a file that is at least 400 x 514 pixels. However, if you simply crop a photo to these dimensions, you might still get rejected. The real culprit is the Head Height Ratio. According to ICA official guidelines, your head must occupy between 25mm to 35mm of the vertical space. If your head is too zoomed in or too far away, the facial recognition algorithm fails to find the anchor points it needs.
| Feature | ICA Requirement |
|---|---|
| Physical Size | 35mm (W) x 45mm (H) |
| Digital Dimensions | Min 400 x 514 pixels |
| Head Height | 25mm to 35mm (approx. 74% of height) |
| File Format | JPEG / JPG |
| Max File Size | 2MB |
Facial Geometry and the Biometric 'Rule of Thirds' #
Think of your face as a map. The ICA software looks for a neutral expression. This isn't just a bureaucratic whim. When you smile, your cheeks rise and your eyes narrow, which alters the distance between your key biometric markers. To ensure compliance:
- Eyes: Must be open, clearly visible, and looking directly at the camera. No squinting.
- Mouth: Closed. No teeth showing. This is the most common reason for 'minor' rejections.
- Head Position: Perfectly centered. A 2-degree tilt can throw off the symmetry needed for AI validation.
The 'Home Studio' Blueprint: Lighting and Hardware #
You don't need a $2,000 DSLR. In fact, a modern smartphone paired with a passport size photo editor often produces better results than an old photo booth. The secret isn't the gear; it's the light.
The 'Golden Hour' Trick: Using Natural Light to Kill Shadows #
The number one enemy of a passport photo is the shadow. Specifically, the shadow behind your ears or under your nose. If you use a ceiling light, you’ll get 'raccoon eyes.' If you use a camera flash, you’ll get 'hotspots' that look like white noise to a scanner.
The Fix: Find a large window during daylight hours. Stand about 1 to 2 meters away from a plain white wall, facing the window. The window acts as a giant 'softbox,' providing even, diffused light. If you see a shadow on the wall behind you, step 50cm forward. This uses the Inverse Square Law of light to make the background appear brighter. This level of technical detail is what makes a professional passport photo maker effective.

Phone Settings for Pro Results: Ditch the Flash and Use 2x Zoom #
Most people take a 'selfie' from an arm’s length. This is a mistake. Wide-angle lenses cause 'barrel distortion,' making your nose look larger and distorting facial structure.
Instead, have someone else stand 2 to 3 meters away and use the 2x or 3x Telephoto lens. This flattens your facial features, providing a much more accurate and compliant representation for biometric software. For the best results, avoid manual cropping and use an automated passport size photo editor to handle the technical ratios.
The Top 10 Silent Rejection Killers #
Sometimes you follow the rules and still get that dreaded email. Here are the 'invisible' reasons applications stall:
- The 'Halo' Effect: If your white wall is actually 'eggshell,' the AI might flag it. Professional tools fix this automatically.
- Hair Over Eyebrows: Eyebrows are key biometric markers. Keep them clear of hair.
- Shoulder Alignment: Your shoulders must be level and squared to the camera.
- Spectacle Glare: Even if you wear glasses, I recommend removing them to avoid reflection delays.
- JPEG Compression: Never send your photo over WhatsApp. It adds 'artifacts' that look like grain to the ICA system. Always use the original high-resolution file.
- Red-Eye: Some sensors produce a red tint in the pupils, breaking eye-recognition software.
- Colored Contact Lenses: Strictly forbidden. Your iris must be its natural color.
- Clothing Contrast: Wear a dark color to provide a clear contrast against the white background.
- Headgear: Unless for religious/medical reasons, keep your head clear of accessories.
- Shadows on the Background: Step forward to let the light wrap around you and eliminate silhouettes.
The Newborn Protocol: A Parent’s Guide to Stress-Free Baby Photos #
Taking a passport photo of a newborn is easily the most stressful part of new parenthood. How do you get a two-week-old to look at a camera with a neutral expression? While the ICA is slightly more lenient with infants, the core requirements still apply.
The 'White Bed-Sheet' Flat Lay Method #
Don't try to hold the baby up—it's a recipe for shadows and visible hands.
- Setup: Lay a crisp, ironed white bedsheet on the floor near a bright window.
- Positioning: Lay the baby on their back. Ensure no shadows from your own body fall across their face.
- The Shot: Stand directly above the baby. This ensures a uniform background.
- The 'Hands-Off' Rule: No hands should be visible. If you need to support the head, do it from underneath the sheet.
For more specific tips on infant documentation, the Ministry of Home Affairs provides updates on registration processes, emphasizing that the photo is the most common delay in Birth Certificate issuance.
Special Requirements for PR and Digital IC Applications #
Applying for Permanent Residency (PR) or a Long-Term Visit Pass? The photo requirements are identical to the passport, but the upload portal is different. The Electronic Identity (e-IC) system often performs a 'live' check during the upload.
One nuance often missed is the file size limit. While the ICA wants high quality, they have a maximum file size (usually 2MB). This is where a professional passport photo maker provides a massive advantage—they optimize the file size while maintaining the 'DPI' required for biometric printing.
Cross-Border Intelligence: Malaysia, US, and Schengen Nuances #
If you're a Singapore resident applying for a foreign visa, don't assume the ICA rules apply across the board.
- Malaysia Passport Photo: Dimensions and head-size ratios differ from Singapore’s. These follow standards defined by ISO/IEC 19794-5.
- USA Visa (DS-160): This is a 2x2 inch (51 x 51 mm) square photo. If you upload a 35x45mm Singapore passport photo, it will be rejected. See the U.S. Department of State for details.
- Schengen Visas: These follow ICAO Doc 9303 standards and are strict about the 'age' of the photo (within 6 months).
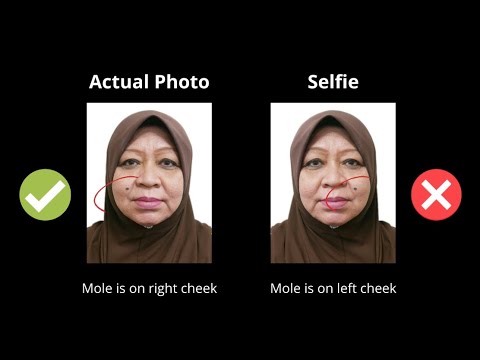
AI vs. Manual Editing: Why You Shouldn't Use Photoshop #
You might be tempted to use Photoshop to remove the background. I strongly advise against this. Human hands are imprecise. When you manually crop, you might inadvertently change the 'Aspect Ratio,' making you look like a funhouse mirror version of yourself in the ICA system.
Furthermore, the ICA uses Image Forensics. If their system detects 'heavy manipulation' (like digitally 'painted' backgrounds), it can trigger a manual review. Our AI at IC Photo Singapore doesn't 'paint' your photo. It uses mathematical algorithms to identify the 'subject-to-background' boundary, ensuring compliance without compromising authenticity.
Frequently Asked Questions #
What is the Singapore passport photo size? #
The official sg passport photo size is 35mm wide by 45mm high for physical prints, and at least 400x514 pixels for digital uploads to the MyICA portal.
Can I take my own passport photo with a phone? #
Yes, you can make passport size photo online free or use a professional service. The key is to follow ICA requirements regarding lighting, background, and facial expression.
Why was my ICA photo rejected? #
Common reasons include shadows on the face, hair covering eyebrows, showing teeth, or wearing white clothing against a white background.
Do I need to remove my glasses for a passport photo? #
While ICA allows glasses as long as there is no glare and the frames don't cover the eyes, we recommend removing them to guarantee acceptance.
The 15-Point Pre-Upload Checklist #
Before you hit 'submit' on the MyICA portal, run through this list:
- Background: Pure white with no shadows or patterns.
- Lighting: Evenly lit on both sides.
- Eyes: Open and looking directly at the lens.
- Eyebrows: Fully visible and not covered by hair.
- Mouth: Closed (no teeth).
- Head Position: Straight ahead (not tilted).
- Glasses: Removed to avoid glare.
- Shoulders: Level and visible.
- Clothing: Dark color for contrast.
- Head Size: Takes up 70-80% of the frame.
- Focus: Sharp with no motion blur.
- Resolution: At least 400x514 pixels.
- File Format: .jpg or .jpeg.
- Recency: Taken in the last 3 months.
- Authenticity: No filters or heavy retouching.
In conclusion, mastering your passport application starts with the perfect photo. By using a professional passport photo app and following these technical steps, you can ensure a smooth, rejection-free experience with the ICA.
References and Authority Sources: #
- ICA Official Photo Guidelines: https://www.ica.gov.sg/photo-guidelines
- International Civil Aviation Organization (ICAO) Doc 9303: https://www.icao.int/publications/pages/publication.aspx?docnum=9303
- Ministry of Home Affairs (MHA) Singapore: https://www.mha.gov.sg/
- ISO/IEC 19794-5 Biometric Data Interchange: https://www.iso.org/standard/50867.html
- U.S. Department of State - Photo Requirements: https://travel.state.gov/content/travel/en/passports/how-apply/photos.html
Ready to Create Your Photo?
Get your perfect passport, IC, or visa photo in minutes. AI-powered, ICA-compliant, instant download.
Create Your Photo Now