The Ultimate ICA Passport Photo Masterclass: How to Avoid Rejection
Master the Singapore biometric passport photo requirements with our expert guide. Learn how to set up a DIY home studio, avoid common ICA rejection traps, and use the best passport photo app techniques to ensure 100% acceptance on your first try.
Few things are as annoying as checking the MyICA portal only to see that your passport photo was rejected—three days after you uploaded it. You’ve probably spent twenty minutes wrestling with a fussy toddler or hunting for a wall in your HDB that doesn't have a scuff mark, only to be sent back to square one. While many still look for a passport photo shop near me, the modern traveler is switching to a professional passport photo app to save time and ensure precision.
I’ve spent years analyzing what makes a biometric photo pass or fail. The Immigration & Checkpoints Authority (ICA) isn't being “difficult” for the sake of it. They follow international biometric standards—specifically ICAO Doc 9303—that allow those automated gates at Changi Airport to process you in seconds. If you want to stop the rejection cycle, you have to stop thinking of this as a "nice photo" and start seeing it as a piece of high-precision data.
The Biometric Logic: Your Face as a Data Point #
Most people think a passport photo is just a way for an officer to see what you look like. In reality, your photo is a map. When you upload your image, the ICA’s algorithm isn't looking at your hairstyle; it’s measuring the distance between your pupils, the width of your nostrils, and the distance from your chin to your crown.
The T-Zone: Your Facial GPS #
The algorithm focuses heavily on the "T-Zone." This spans from your eyebrows down to the tip of your nose and across your mouth. If your hair covers your eyebrows, you’ve just obscured 20% of the primary data points the system uses to verify your identity. This is a leading cause for ICA photo rejection in Singapore. Even a few stray strands of a fringe can trigger a "fail" because they create micro-shadows that confuse the software.
Why Your Eyebrows Must Be Visible #
Your eyes are the most unique part of your face. For a photo to be biometric-ready, the irises must be clearly visible. This means no “red-eye,” no glare on glasses, and zero tinted lenses. If the system can't define the circular boundary of your iris, it can't lock your facial profile. According to ICA official guidelines, your eyes must be wide open and looking directly at the camera.
The 'Home Studio' Blueprint: Professional Lighting on a Budget #
You don’t need a $2,000 DSLR. Your smartphone is more than capable, provided you understand how light works. The biggest mistake? Using a ring light. While they're great for social media, ring lights create circular reflections in your pupils (catchlights) that can interfere with biometric eye detection.
Window Light vs. Ring Lights #
Position yourself about 1 to 1.5 meters away from a window. You want soft, diffused light. This means the sun shouldn't hit your face directly—which causes harsh shadows—but the room should be bright. If you use a ceiling light, you’ll end up with shadows under your eyes and chin—colloquially known as "raccoon eyes"—which the ICA algorithm will reject because it obscures your facial contour.
The White Towel Reflector Hack #
If one side of your face is brighter than the other, don’t reach for a lamp. Instead, have someone hold a large white towel or foam board just outside the camera frame on the darker side of your face. This technique, often used in professional portrait lighting, bounces natural window light back onto the shadow side, evening out the exposure without creating weird new shadows.
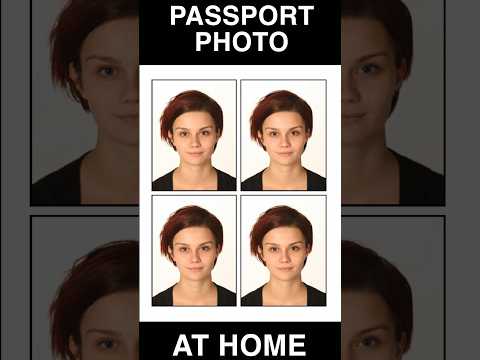
Mastering the 400x514 ICA Technical Standard #
This is where most DIY attempts fail during the upload phase. The MyICA portal is incredibly picky about the sg passport photo size. If your photo is even one pixel off the mandatory ratio, the system might stretch the image or simply refuse the upload.
| Requirement | Specification |
|---|---|
| Dimensions | Exactly 400 x 514 pixels |
| File Format | JPEG (.jpg or .jpeg) |
| File Size | Under 2.0 MB |
| Head Height | 70% to 80% of the vertical height |
Using a dedicated passport size photo editor ensures these technical markers are met automatically. The Singapore Government Developer Portal highlights that digital transformation in government services relies on such standardized data to function efficiently.
Clothing & Contrast: Defeating 'Floating Head' Syndrome #
Singapore’s passport background must be white. Not off-white or cream, but stark white. This creates a massive problem for the AI that handles background removal if your clothing choice is poor.
The Problem with Light Colors #
If you wear a white shirt or a light grey polo, the algorithm often can’t tell where your shoulders end and the background begins. This results in "Floating Head Syndrome," where the final cropped photo looks like a decapitated head hovering in space. This is an automatic rejection.
The Best Colors for a Sharp Edge #
Wear dark, solid colors. Navy blue, black, or charcoal are your best friends. These provide a sharp “edge” for the software to detect. Avoid busy patterns, as high-contrast stripes can create "moiré patterns"—a shimmering effect that can degrade image quality on digital sensors.
The Newborn Survival Guide #
Taking a newborn passport photo Singapore is a stressful rite of passage. Infants don’t follow directions, and they certainly don't understand "neutral facial expression." If you find yourself searching for a free passport photo app to handle this, ensure it has specific tools for infant positioning.
The Floor Method #
Don’t try to hold your baby up against a wall. It’s unsafe and your hands will likely end up in the shot. Instead, lay a white bedsheet on a flat floor in a well-lit room and lay the baby on it. This ensures the background is flat and the baby is comfortable. Standing directly over them (safely!) is the best way to capture the required front-facing angle.
Managing 'Face Shine' and Alertness #
For infants, rules are slightly more relaxed regarding the mouth being closed, but eyes must be open. Pro tip: Wait until 15 minutes after a nap and a feed. If the baby’s face looks oily from the heat, a quick dab with a tissue is essential, as bright spots from "face shine" can be misread as facial distortions by ICA scanners.
Common Myths and Rejection Traps #
There’s a lot of bad advice on forums like Reddit. Let’s clear it up. A reliable passport photo maker will always prioritize compliance over aesthetics.
Myth: "I can use the same photo from my IC two years ago." Incorrect. ICA requires a photo taken within the last 3 months. Their system is now excellent at cross-referencing previous submissions. If the AI detects that your "new" photo is identical to the one on your 2022 IC, it will be flagged as outdated.
Myth: "A little bit of 'Beauty Mode' is fine." Absolutely not. Any digital alteration—thinning the face, smoothing skin, or brightening eyes—alters the biometric data. If the software detects manipulation, it’s an instant rejection. It’s better to have a temporary blemish in your photo than to wait an extra two weeks for a re-submission.
Frequently Asked Questions #
Can I take my own passport photo at home? #
Yes, you can make passport size photo online free using your smartphone if you follow the ICA guidelines regarding lighting, background, and head positioning. Using a specialized app is recommended to ensure the 400x514 pixel ratio is exact.
What is the best color to wear for a Singapore passport photo? #
Dark, solid colors like navy blue, black, or dark green are best. They provide the necessary contrast against the white background to avoid the "floating head" effect.
Why was my digital passport photo rejected by ICA? #
Common reasons include hair covering the eyebrows, shadows on the face or background, wearing white clothing, or the file not meeting the exact 400x514 pixel requirement.
Can I wear glasses in my ICA passport photo? #
ICA recommends removing glasses to avoid glare or frames obscuring the eyes. If you must wear them, there must be no reflection on the lenses and the frames must not cover any part of the eyes.
The Final Inspection Checklist #
Before you hit upload, run through this list:
- Hair: Are my eyebrows fully visible? Is hair tucked behind my ears?
- Eyes: Are my irises clear? Is there any glare on my glasses?
- Expression: Is my mouth closed? Am I looking straight ahead, not tilting my head?
- Clothing: Is there a clear, dark contrast between my shoulders and the wall?
- Technical: Is the file a JPEG under 2MB and exactly 400x514 pixels?
If you're feeling unsure, use a tool like IC Photo Singapore. It handles the technical heavy lifting—background removal and pixel scaling—while validating against ICA standards. It’s the difference between a 2-minute upload and a 2-week delay.
Ready to Create Your Photo?
Get your perfect passport, IC, or visa photo in minutes. AI-powered, ICA-compliant, instant download.
Create Your Photo Now